Bake your own Chocolatey NuGet repository

INTRO: I recently attended SoCal Code Camp to check out talks on some DevOps tools I’ve been looking into adding to my toolkit (Vagrant and either Chef or Ansible). The talk on Chef was in the second hour and looked like it would end up being standing room only, so in the first hour I went to the talk that was in the same room to make sure I’d have a seat for Chef. The talk was “Quickly spin up a new windows machine and get your software installed using Chocolatey” by Justin James. I quickly Googled Chocolatey; being a PowerShell guy I figured it sounded pretty cool and I’d be able to save a seat for Chef, win-win. Little did I know that Chocolatey would be the best thing I’d discover at Code Camp that weekend. 🙂

Also, I need to give credit to itToby for his article Setup Your Own Chocoloatey/NuGet Repository.  It was a huge help in getting a jump start in understanding what was going on under the hood with the NuGet Server setup after seeing the demo at Code Camp.  I used that walk-through when I built my first server, but then I kept thinking back to the demo and felt it was much easier…  Thats when I remembered the Chocolatey.Server package that Justin used and figured I could Boxstarter the whole thing.

I can’t think of a better way to show off how cool Chocolatey and Boxstarter.org are than using them to build themselves.  So, get yourself a Windows 2012 server, open up CMD.EXE and run the following:  START http://boxstarter.org/package/nr/url?https://raw.githubusercontent.com/RichHopkins/chocolatey-server-build/master/chocolatey.server.build.txt

START

START

Click through a few Boxstarter prompts and kick back.  Its that easy!
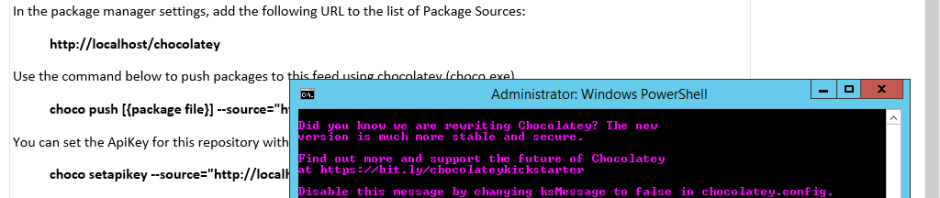
Warning 1

Warning 1

Warning 2

Warning 2

Finished

Done!

Next post…  re-working the Chocolatey and Boxstarter installers and packaging them on your own repository for a fully internal build setup.

This entry was posted in DevOps, Enterprise Management and tagged , , , , , , , . Bookmark the permalink.

6 Responses to Bake your own Chocolatey NuGet repository

  1. Pingback: Modifying Chocolatey and Boxstarter packages for internal use | Rich Hopkins

  2. Pingback: How To Host Your Own [Private/Internal/Public] Package Repository Server (aka Package Feed) | Something Different

  3. djuplina says:

    For anybody still playing with this, the second to last line doesn’t kick off properly, as the C:\ProgramData\chocolatey\lib\chocolatey.server.0.1.1 directory should be updated to C:\ProgramData\chocolatey\lib\chocolatey.server\tools\chocolatey.server\*

    • dragon788 says:

      Excellent tip, I was going to make the same comment before I saw yours. I forked the original gist and commented out some sections I didn’t need, at some point I may try to push it as a package that acts as a “wrapper” around the base Chocolatey.Server on Chocolatey.org so it requires less effort from a user who just wants a simple Nuget feed without having to know anything about IIS.

  4. Pingback: Bake your own Chocolatey NuGet repository | Chocolatey

  5. dragon788 says:

    This also was having issues for me on IIS 7.5 and higher (Server 2012/R2) so I updated the Gist with some alternative options that are valid for the newer IIS and ensure that the permissions from the Chocolatey wiki step 3 are properly applied as well so you can push to the server remotely and not just copy files to the directory on the server itself to deploy.


    # Boxstarter options
    $Boxstarter.RebootOk=$true # Allow reboots?
    $Boxstarter.NoPassword=$false # Is this a machine with no login password?
    $Boxstarter.AutoLogin=$true # Save my password securely and auto-login after a reboot
    # Unrestricted is only good for testing, don't use that in production
    Update-ExecutionPolicy RemoteSigned
    Disable-InternetExplorerESC
    Disable-UAC
    #Enable-RemoteDesktop
    Set-WindowsExplorerOptions -EnableShowHiddenFilesFoldersDrives -EnableShowProtectedOSFiles
    #Install IIS and needed features
    cinst IIS-WebServerRole -Source WindowsFeatures
    cinst IIS-WebServer -Source WindowsFeatures # This will pull in a bunch of other things
    cinst IIS-Metabase -Source WindowsFeatures
    cinst IIS-BasicAuthentication -Source WindowsFeatures
    cinst IIS-ISAPIExtensions -Source WindowsFeatures
    cinst IIS-ISAPIFilter -Source WindowsFeatures
    cinst IIS-NetFxExtensibility -Source WindowsFeatures
    cinst IIS-NetFxExtensibility45 -Source WindowsFeatures #2012 only
    cinst IIS-ASPNET -Source WindowsFeatures
    cinst IIS-ASPNET45 -Source WindowsFeatures #2012 only
    cinst chocolatey.server #the server package we'll copy to IIS
    $webToolsDir = "C:\ProgramData\chocolatey\lib\chocolatey.server\tools\chocolatey.server\*"
    $webInstallDir = "C:\inetpub\wwwroot"
    Copy-Item $webToolsDir $webInstallDir -recurse -force
    $projectName = "ChocolateyServer"
    Import-Module WebAdministration
    Remove-WebSite -Name "Default Web Site" -ErrorAction SilentlyContinue
    Remove-WebSite -Name "$projectName" -ErrorAction SilentlyContinue
    New-WebSite -ID 1 -Name "$projectName" -Port 80 -PhysicalPath "$webInstallDir" -Force
    Import-Module WebAdministration
    $appPoolPath = "IIS:\AppPools\$projectName"
    #$pool = new-object
    Write-Warning "You can safely ignore the next error if it occurs related to getting an app pool that doesn't exist"
    $pool = Get-Item $appPoolPath
    if ($pool -eq $null) {
    Write-Host "Creating the app pool `'$appPoolPath`'"
    $pool = New-Item $appPoolPath
    }
    # Set appropriate permissions for automatic pool user
    $pool | Set-Item
    Set-itemproperty $appPoolPath -Name "managedRuntimeVersion" -Value "v4.0"
    #Set-itemproperty $appPoolPath -Name "managedPipelineMode" -Value "Integrated"
    # For IIS7 or IIS6 use this instead of the IIS AppPool below
    #$networkSvc = 'NT AUTHORITY\NETWORK SERVICE'
    # After IIS7 they moved towards AppPool permissions
    # http://www.iis.net/learn/manage/configuring-security/application-pool-identities
    $networkSvc = "IIS AppPool\$projectName"
    Write-Host "Setting folder permissions on `'$webInstallDir`' to 'Read' for user $networkSvc"
    $acl = Get-Acl $webInstallDir
    $acl.SetAccessRuleProtection($False, $True)
    $rule = New-Object System.Security.AccessControl.FileSystemAccessRule("$networkSvc","Read", "ContainerInherit, ObjectInherit", "None", "Allow");
    $acl.AddAccessRule($rule);
    Set-Acl $webInstallDir $acl
    $webInstallAppDataDir = Join-Path $webInstallDir 'App_Data'
    Write-Host "Setting folder permissions on `'$webInstallAppDataDir`' to 'Modify' for user $networkSvc"
    $acl = Get-Acl $webInstallAppDataDir
    $acl.SetAccessRuleProtection($False, $True)
    $rule = New-Object System.Security.AccessControl.FileSystemAccessRule("$networkSvc","Modify", "ContainerInherit, ObjectInherit", "None", "Allow");
    $acl.AddAccessRule($rule);
    Set-Acl $webInstallAppDataDir $acl
    # Start pool after permissions set
    Start-WebAppPool "$projectName"
    Write-Host "Creating the site `'$projectName`' with appPool `'$projectName`'"
    New-WebApplication "$projectName" -Site "$projectName" -PhysicalPath $srcDir -ApplicationPool "$projectName" -Force
    & START http://localhost

Leave a comment